


Can You Install A Tile Over Tile?
Installing tile over tile can be a game-changer whether you’re giving your bathroom, kitchen, or even outdoor space some new shine! You can avoid tearing out old tiles. Or can you?
This method saves time, energy, and money. But like all projects, it requires some thought, planning, and proper execution.
Ready to explore this budget-friendly way to freshen up your space? Let’s dive into it.
Why Install Tile Over Tile?

You may be wondering why install tile over tile in the first place. The answer is pretty straightforward, really.
Taking out old tiles can be a tough choice, and time-consuming. You’ll need to bust up the old tile, scrape off the glue or adhesive underneath it, and then deal with clean-up. Plus, if your old tile was laid on a concrete or cement slab — things get even more difficult!
Those of you old enough to remember that 30 or 40 years ago, one of the easiest and quickest ways to resurface a tired old floor—or wall, for that matter—was to install a layer of tile over the existing surface material.
That’s right!
You spread some glue on the old floor (often with terrible adhesion), then place your new ceramic tiles atop the layer of the thinnest adhesive.
Sure, some people would work on removing their floor’s plywood underlayment before starting anew with fresh flooring. But who had time for all that?
Especially since troweled-on mortar beds weren’t nearly as messy as they used to be!
Everyone from Bob Vila’s Childhood Home Renovation Tips survived this DIY home renovation.
But we’re here in Bob Vila land—and in 2024—one installment wiser and slightly more safety-conscious than our planet’s last episode allowed us to be.
When You Shouldn’t Do It!
Before we discuss how this is a caution for everyone who wants to do it! It is important to discuss why you shouldn’t. This is so you do not start adding the necessary items to your Amazon cart only to be disappointed later.
While this method is convenient, it’s not appropriate in all situations!
It’s important to understand if this is the right choice for you or if there are other options you should consider.
Do you have any of the following in your bathroom?
Cracked or Damaged Tiles: If your current tiles are cracked, lost, or damaged in any way, tiling over them is not an option. The new tiles will not stick properly and that can cause more issues down the road.
Uneven Surface: When the existing tile surface is not flat, the new tiles will not lay evenly. In effect, this will give a bumpy or uneven finished look.
Water Damage: Sometimes water damage can cause the adhesive under the tiles to weaken. Then it is necessary to remove the damaged tile and repair it prior to re-tilling.
However, if your existing tiles are in good condition, let’s get to the fun bit!
Related: The Impact Of Climate Change On Property Maintenance And Efficiency
Step-by-Step Guide To Installing Tile Over Tile

Here’s a breakdown of what you’ll need and how to do it.
Materials You’ll Need:
- New tiles (ceramic, porcelain, or stone)
- Tile adhesive (thin-set mortar)
- Grout
- Notched trowel
- Tile spacers
- Level
- Tile cutter or wet saw
- Sponge and bucket of water
- Measuring tape
- Primer (optional)
- Sandpaper or a floor grinder
- Rubber mallet
- Grout float
Rewriting: Step 1: Prepare the Old Tiles
Before you start tiling, it’s all about the preparation.
Clean the Surface: Before tiling over the tile, make sure your existing tiles are cleaned thoroughly. Any dust, grease, or grime will weaken the bond of your new adhesive. So, use a heavy-duty cleaner and clean the surface as best as possible.
Check for Loose Tiles: Check whether any tiles have become loose. Just tap them with a screwdriver or something similar. If they sound hollow, they’ve come loose from their base and should be replaced before tiling.
Sand the Surface: The old tile’s smooth, glossy surface can make it tough for adhesive to bond. Use sandpaper or a floor grinder to roughen up the surface. Don’t skip this step—it’s crucial for strong adhesion.
Step 2: Prime (Although Optional)
You don’t always need to prime, but a tile primer will help the new adhesive bond better. Just roll it on and let it dry for the recommended time.
Step 3: Plan Your Layout
Now comes the fun part!
Planning the layout. Dry-fit your new tiles before applying adhesive to ensure you like the look. This will help you clearly understand where each tile will go and if any need cutting.
Start in the Center: It’s often easiest to begin tiling from a room or wall’s center point and work your way out. Doing so can help create an even layout, especially if you want a black-and-white bathroom.
Tile Spacers- Use tile spacers to maintain even grout lines between each tile.
Step 4: Apply Adhesive
Spread the Thin-Set Mortar: Take a towel, and create a notch, and then spread the thin-set mortar over a small area of the old tile.
Hold the trowel at a 45-degree angle and use the grooves formed by the notches to create an even layer of mortar.
Lay the New Tile: Press the new tile firmly. Give it a slight twist to make sure it sticks. You can also use a rubber mallet to tap the tile into place gently.
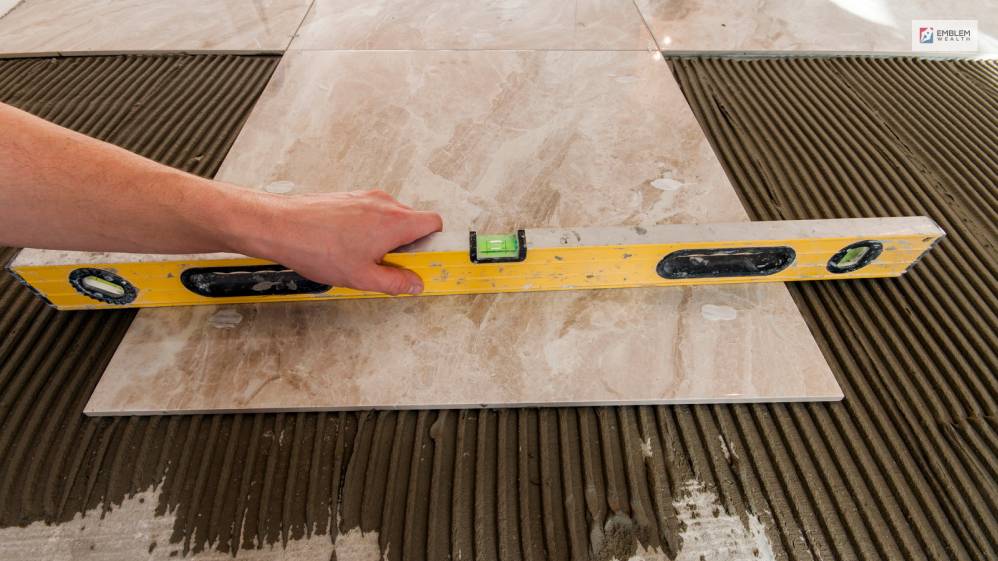
Check for Levelness: After placing each tile, use a level to make sure it’s even. If a tile sits higher or lower than the others, gently tap it down or add more adhesive to the lower areas.
Step 5: Let It Dry
This is the most important step of all! You let your adhesive dry for 24 hours before moving on to the next step.
This will ensure that your tiles are stuck down well and won’t move when you go to grout them.
Step 6: Grouting The Tiles
When the tiles have dried, it is now time to grout.
Mix the Grout: Check the manufacturer’s instructions to mix the grout. It should be smooth and thick, not runny.
Apply the Grout: Now, you will use the grout float to spread it diagonally across the tiles, forcing it into all of the empty spaces.
Wiping the Grout Let the grout sit for about 10 minutes, then take a damp sponge to wipe away the excess grout. Rinse the sponge frequently, and don’t press too hard, or you’ll pull grout out of the joints.
Step 7: Final Touches
You’re almost finished!
After the grout dries up, buff away any remaining grout haze on the tiles with a dry cloth. If you have a room prone to high moisture and humidity, like a bathroom, you may want to seal your grout for protection against water damage.
The Total Cost
Budget doesn’t mean compromising. Here’s an idea of what’s involved cost-wise in a tile-over-tile project:
Tiles: Prices can vary substantially, but you should be able to find some budget options for around $1-5 per square foot.
Adhesive and Grout: You’ll likely need a couple of bags of thin-set mortar and grout which will probably run you about $30-50 depending on the size of your project.
Noted trowel: $15 Tile spacers (optional): $10 Primer (optional): $25.
All told, you could be looking at a cost of up to $2 to $6 per square foot. Therefore it’s a budget-friendly way to freshen up any room in your house.
What About Heated Floors?
Here’s a little extra that many guides miss. If you’re considering heated floors, you can still install them with a tile-over-tile setup! Heated mats can be placed between the old tile and the new one.
They add a touch of luxury, especially in bathrooms or cold climates, and they’re not as expensive as you might think.
Ensure you consider the height of both the mats and new tiles to avoid door clearance issues.
Final Thoughts
Installing tile over tile is a great budget-friendly option to breathe new life into your space. It saves time and money while still giving you the look of a fresh tile installation.
Just remember to ensure your existing tiles are in good shape, prepare the surface well, and follow the steps above for a seamless and professional result.
Now that you know how easy and cost-effective it is, are you ready to start your next tile project?
Go for it—you’ve got this!
Read Also:

Must Read

How To Reduce Downtime In Automotive Manufacturing

Brumeblog Com: A Deep Dive Into The Latest Information Hub Of 2026

How Commercial Debt Collection Works

Understanding the Hidden Impact of Single Process Changes


Leave A Reply